Planning your bathroom tiles is an important part of any bathroom renovation project. It is the point where functional waterproofing meets your personal style. The truth is, getting it right goes far beyond just looking good. The importance of nailing the layout, measuring up, and choosing the right flooring cannot be stressed enough if you want a high-quality, long-lasting finish. Here we help you to select the best bathroom tiles to balance the need for long-lasting durability with architectural flair. Calculating just the right amount to buy, sourcing surfaces that are safe to walk on, really matters. This guide is all about how to choose bathroom tiles and making sure your project turns out to be a real winner!
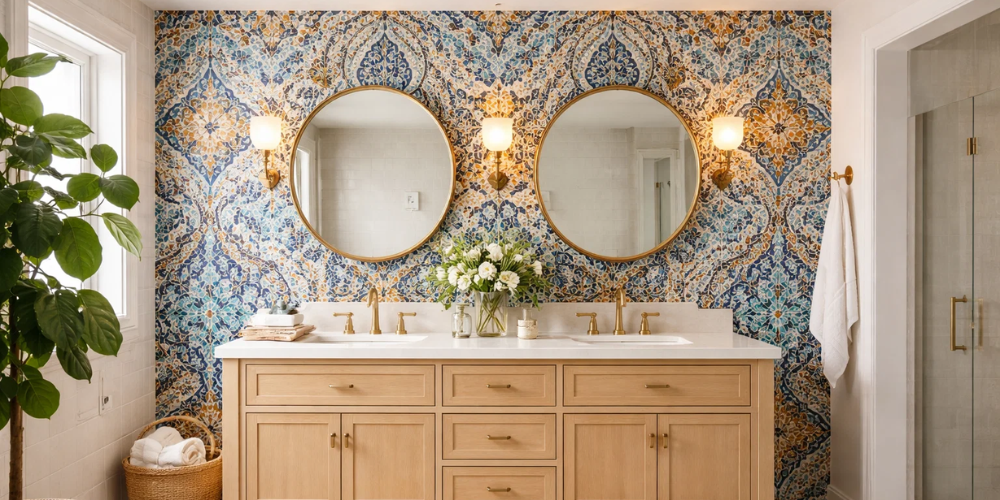
Which tiles are best for bathrooms?
Before exploring colours and patterns, you must consider the material. The bathroom environment is unique due to constant exposure to water, steam, and cleaning chemicals. Therefore, the durability and porosity of your chosen material are paramount.
Ceramic tiles for bathroom walls
For many UK homeowners, porcelain and ceramic tiles are often the top two options they are considering. Ceramic tiles are generally more economical and far easier to cut, which has made them a popular choice amongst DIY enthusiasts who like to keep costs down with DIY projects. However, they are more porous compared to porcelain, which might not be ideal in some cases.
When calculating costs for large-scale wall projects, ceramic remains the budget-friendly option. You have many finish options to choose from, ranging from super-shiny high gloss that bounces the light around to more modern matt finishes. They adhere well to bathroom walls where the water is not directly splashing all over them, though they do not quite have the same level of density as porcelain.
Porcelain tiles for floors and walls
Porcelain is fired at high heat, which results in a denser, far harder and more durable tile that is almost completely waterproof as a result. If you are looking to buy a tile that will last the distance and keep water out, porcelain is often cited as the go-to choice for bathrooms where water immersion is a real concern. This is especially the case for walk-in showers and wet rooms. Its exceptional strength also helps it withstand chips, scratches, and foot traffic without so much as a scratch, meaning you can keep that bathroom looking like new for years to come. The fact that the material is so dense also means it does not absorb moisture anywhere near as much as other tiles, which in turn makes it almost stain-proof.
Stone and stone-effect tiles
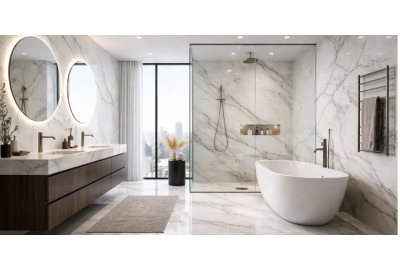
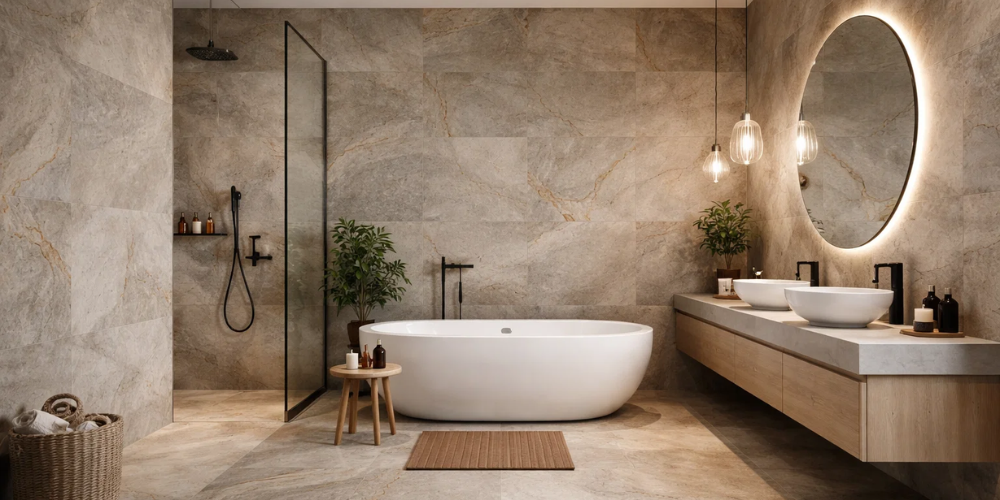
When looking for a premium finish like natural stone, strongly consider buying marble, travertine, or slate. Every single stone tile is going to be one of a kind; that is what gives these fabulous materials their high-end, organic feel. But, be warned, natural stone tiles need a lot of care and attention. It needs to be sealed regularly to stop water from seeping in and leaving stains, which can be a real pain to sort out.
Alternatively, if you love the look of stone but would rather not be bothered with the extra work, the modern "stone-effect" porcelain is a brilliant alternative. Made to mimic the vein patterns of marble or the texture of slate, but without the need for those specialist sealing products you will be dreading the thought of applying (and re-applying) every few months.
Glass and mosaic accents
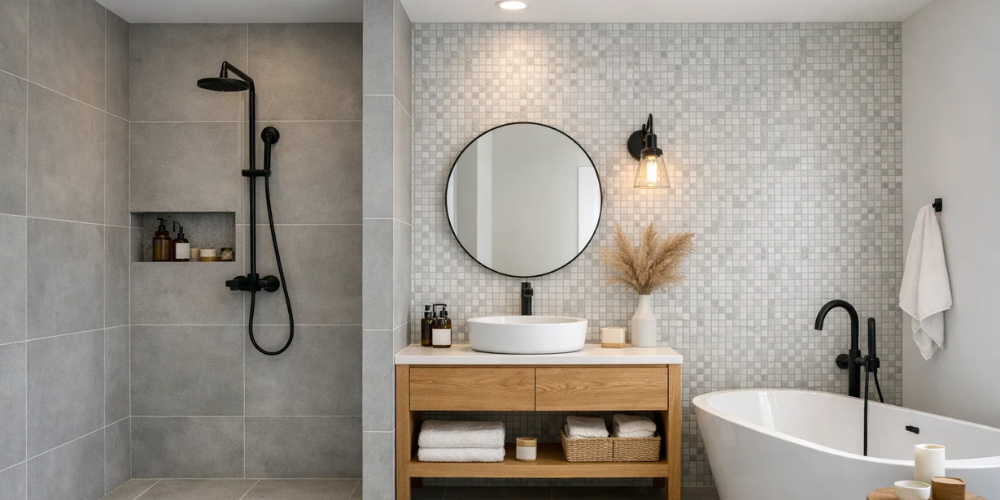
Glass tiles are non-porous and reflect light beautifully, making them excellent as tiles for small bathrooms that feel dark. Mosaic tiles, usually sold on mesh backing, are perfect for curved surfaces or creating feature strips. Because they have many grout lines, they also provide natural slip resistance, which is a key factor when considering how to choose bathroom flooring.
Understanding how to choose bathroom tiles
Once the material is settled, you move into the creative phase. To successfully master how to choose bathroom tiles, you must balance the size of the room with the visual impact you desire.
Tile function within the bathroom
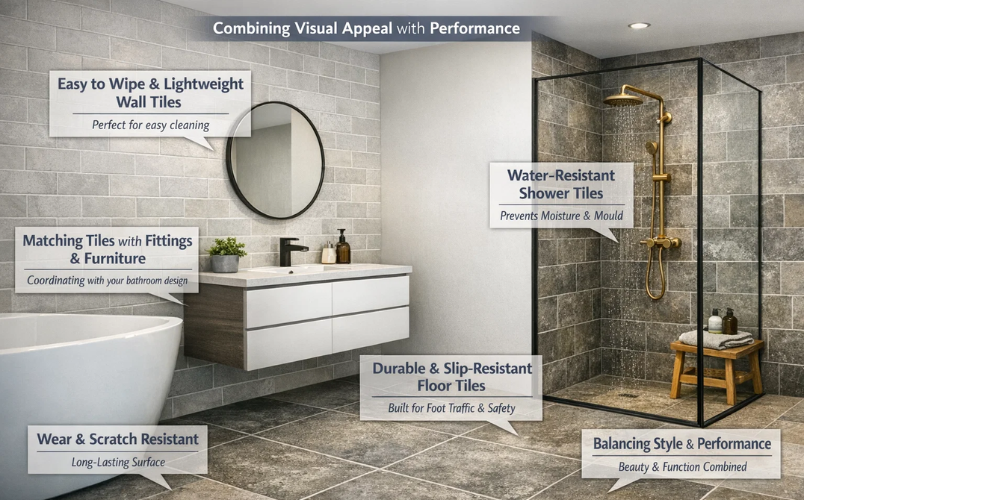
Buying bathroom tiles is all about understanding the unique needs of each area in your bathroom. Wall tiles need to be easy to wipe & clean and lightweight, so they do not put too much weight on the walls. While floors must be strong enough to handle all the foot traffic and slips and falls that can happen. In areas that remain constantly wet, such as showers and wet rooms, it is essential to consider how well tiles for your bathroom cope with ongoing moisture. The right tiles must manage excess water effectively to prevent damage to the structure.
Combining visual appeal with performance
When you decide which tiles are right for your bathroom, you must find a balance between how they look and how well they will do the job. Being water-resistant is a must in bathrooms as it helps to stop any growth of mould and prevents water from getting into the building's structure. You should also think about the wear and tear when buying tiles, especially if they are going to be floor tiles. You want to make sure the surface will not get worn out or damaged after a while.
Matching tiles with fittings and furniture
To achieve a cohesive look, your tile choice should complement your essential fittings and furniture. Consider how the texture of your wall tiles interacts with the smooth surfaces of baths and vanity units. If you have chosen modern matte black or brushed brass shower finishes, selecting neutral tiles can make these features stand out. Thinking about these interactions is a key part of knowing how to choose bathroom tiles effectively.
Popular bathroom tile layouts
The way you arrange your tiles is just as important as the tiles themselves. Different bathroom tile layouts can change the perception of a room's height or width.
Straight lay and stacked layouts
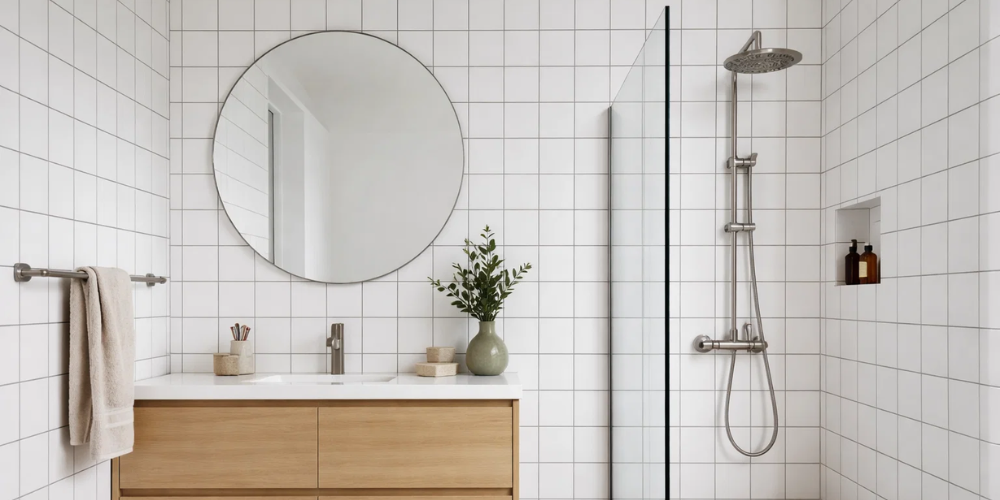
The 'horizontal stack' is where tiles are stacked directly on top of each other. It gives a clean and modern grid appearance that is impossible not to be impressed by! Its popularity in bathroom tile layouts is no surprise, given just how easy it is and the fresh, angular look it provides. When every edge lines up perfectly, you get a minimalist look that lets the tile itself shine in all its glorious colours. Perhaps the best part it is a dream for DIYers, requiring almost no waste and a minimum of planning to get a top-quality finish.
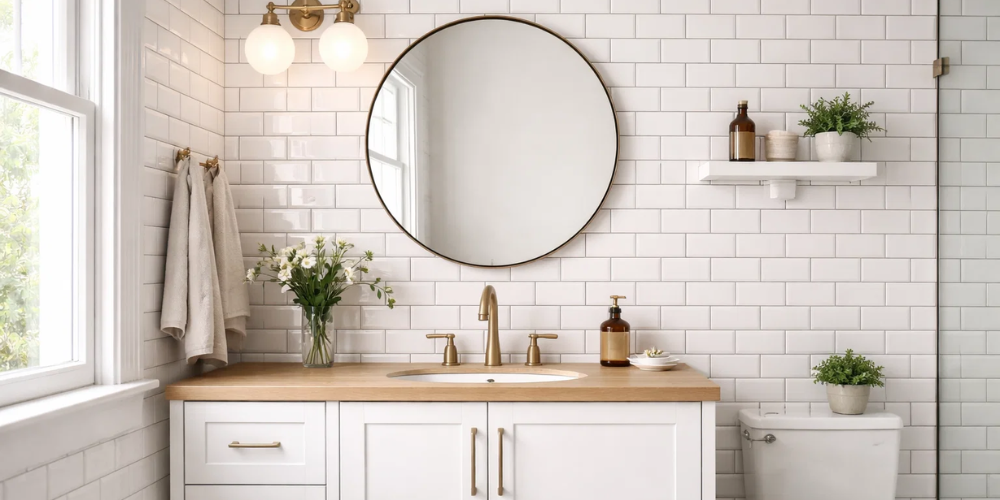
Brick bond and offset patterns
The "brick bond" or "offset" pattern is the classic choice for metro tiles (sometimes called subway tiles). It is a timeless look that feels just like home and is also solid. If you are dealing with low ceilings, you might want to think about the "vertical stack" or vertical brick bond instead. This has the effect of making your ceiling feel higher because it draws the eye upwards. It is a great way to get some visual balance and movement, and the best part is that it is very easy to live with. It hides all the little imperfections in your walls and tile fitting.
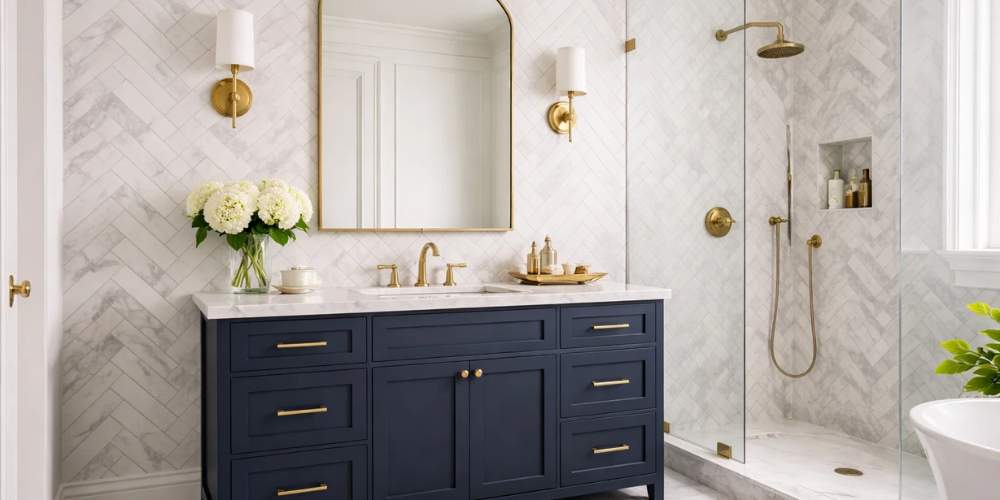
Herringbone designs
For those looking to add a touch of elegance to their design, the herringbone layout is an unbeatable option. By laying out rectangular tiles so they meet at a 45-degree angle, you achieve a striking dynamic V-shape that screams classy. It looks particularly effective on a floor and enhances feature walls in a shower. It does call for more time allowance for cutting and a larger number of scrap tiles. But on balance, though, the extra style it brings to a room is usually well and truly worth the extra installation effort.
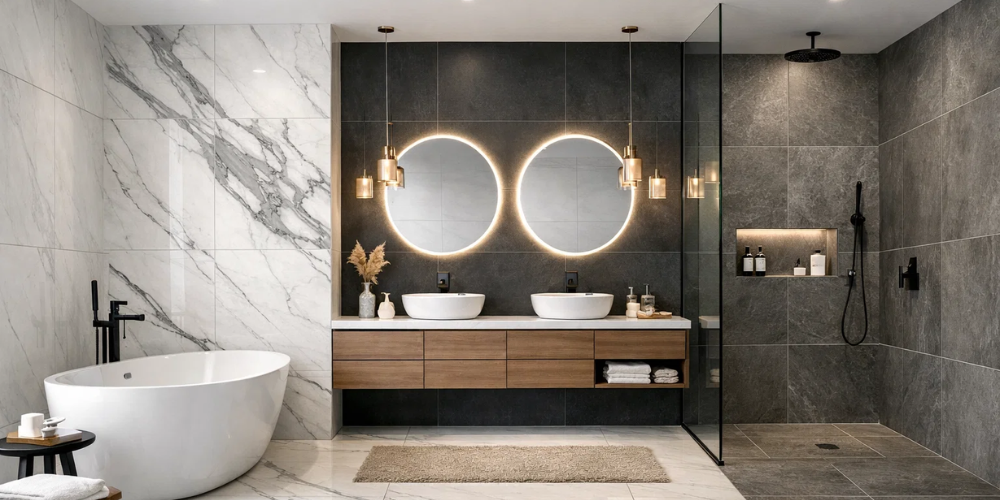
Large format tile layouts
These have become increasingly popular because they let you have fewer grout lines which gives that super sleek "seamless" look that really makes a small room feel like it has a lot more space. With fewer grout lines to maintain, the cleaning is a lot easier, as well as giving your bathroom a high-class, modern look. By reducing visual distractions, these large slabs create a top-end, contemporary style that works well with minimalist designs and open-plan wet rooms, giving your bathroom a luxurious and airy feel.
Modular and hexagonal arrangements
If you are moving away from traditional rectangles, hexagonal tiles offer a honeycomb effect that is incredibly popular in modern UK bathrooms. You can even "bleed" hexagonal tiles into a different flooring material, such as wood-effect porcelain, for a transition that looks like a piece of art.
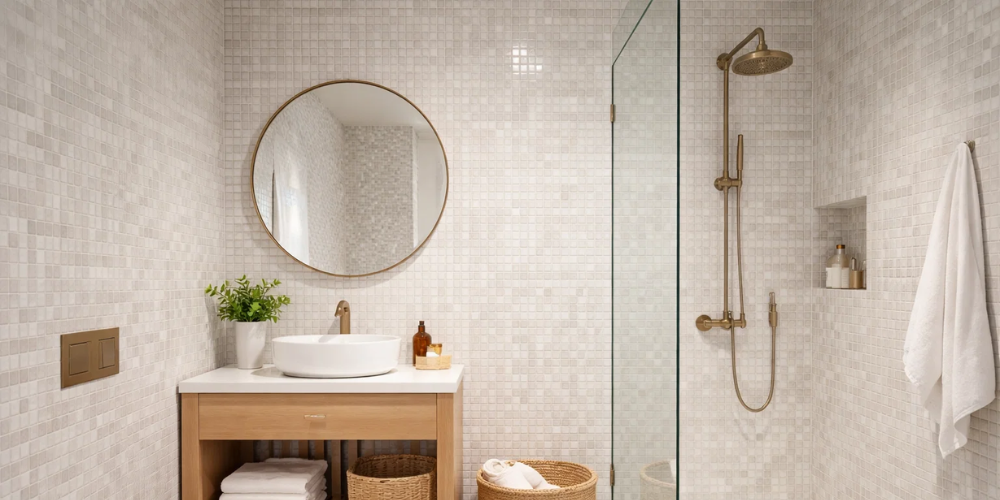
Small tiles and mosaics
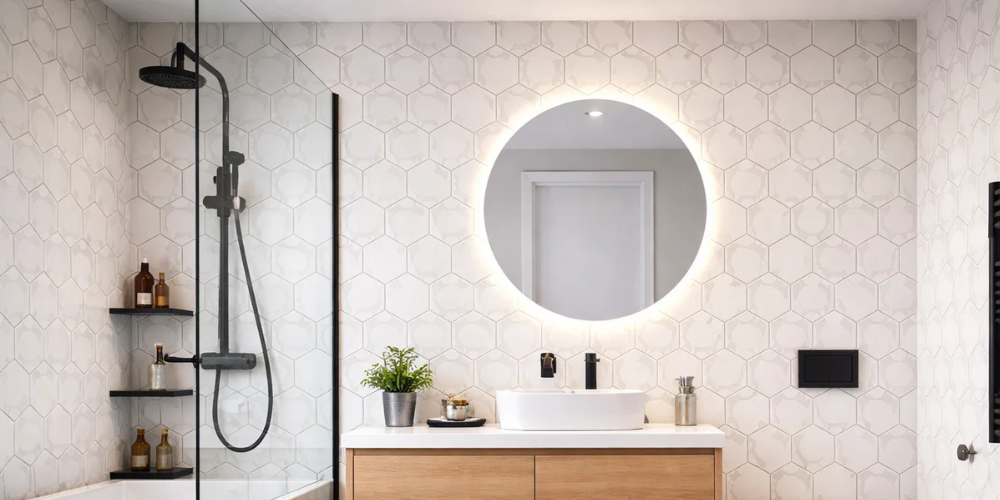
Conversely, small metro tiles or mosaics add texture and detail. Small tiles and mosaics are a versatile design choice available in a variety of materials and patterns, perfect for creating visually interesting backsplashes, shower walls, and floors. High-quality tiles for a small bathroom and mosaics are conveniently sold in mesh-backed sheets, which simplifies the installation process.
Choosing tile size, colour, and finish
We now discuss the importance of tile size, colour and finishes, which are all important considerations.
Selecting tile sizes for the bathroom scale
Choosing the right dimensions for your tiles in the first place is a crucial decision that will influence the overall feel of your space. In small spaces, using larger tiles can have an unexpected effect - they make the space feel bigger by cutting down on the number of grout lines that split up the view. On the flip side, smaller tiles like mosaics or small formats introduce all sorts of texture and visual interest that you are not likely to get with larger tiles.
To strike a nice balance, you need to think about the actual shape and size of the room. Large tiles can give a sleek, modern look, while smaller ones can add a timeless, traditional feel.
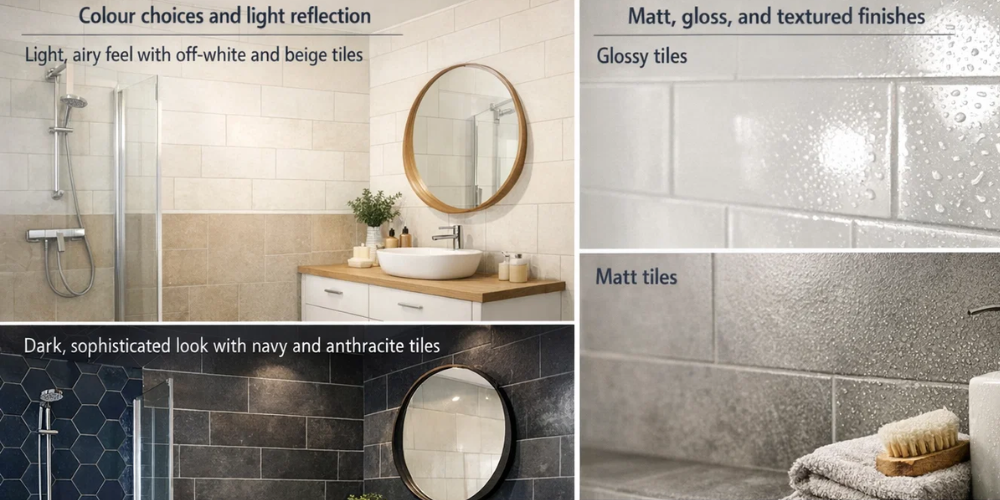
Colour choices and light reflection
Of course, your tile colour choices will also impact on the light reflection. Light colours like off-white, light grey, and beige reflect light and help to create an airy feel. Darker tones, such as anthracite or navy, can create a sophisticated, "boutique hotel" vibe but require good lighting to prevent the room from feeling cramped.
Matt, gloss, and textured finishes
When considering the finish, glossy tiles are easier to wipe clean and bounce light around. "Matt" finishes offer a more contemporary, muted look and are generally better at hiding water spots and fingerprints.
How to measure for bathroom tiles
Precision is the enemy of waste. Learning how to measure for bathroom tiles correctly will save you money and ensure you do not run out of stock halfway through the job. This is a common nightmare when different batches of the same bathroom tiles can have slight colour variations.
Measuring bathroom walls correctly
To begin, break your bathroom down into rectangular sections. For each wall or floor area; measure the height and the width in metres. Multiply these two figures together to get the square metre (m²) area of that section.
For example, a wall that is 2.4m high and 2m wide is 4.8m². Sum all your sections together to get the total area for the project. Do not subtract the area for windows or doors unless they are exceptionally large; it is always better to have a little too much than too little.
Measuring bathroom floors accurately
Measuring your bathroom tiles for a job requires calculating the floor area, fixed obstacles are just part of the challenge. First off, break the floor down into some manageable, rectangular areas. Grab your tape measure and start taking the length and the width of each one. Do not ignore the often-tricky fixtures that come in the way. Remember the plumbing and toilets, basins, vanity units, etc.
It is safest to get the full floor area measured up and accounted for when you are tiling around them, so you do not end up short of the same tiles for tricky cuts. Also consider alcoves and those "in-between spaces". You will want to take them into account, too. Always aim to have enough left over at the end for the future, in case individual tiles become damaged and need replacing.

Allowing for cuts, waste, and patterns
When you have your total m², you must add a "wastage" percentage. This accounts for tiles that break during cutting, as well as the pieces needed to fill corners.
• Standard layouts - add 10%
• Complex layouts (Herringbone/Diagonal) - add 15%
If you are using very large tiles, you might even need to add 20%, as a single mistake on a large-format piece results in a significant loss of coverage.
How to choose bathroom flooring
Selecting what goes underfoot involves a different set of priorities compared to wall tiles. Safety is the primary concern when learning how to choose bathroom flooring.
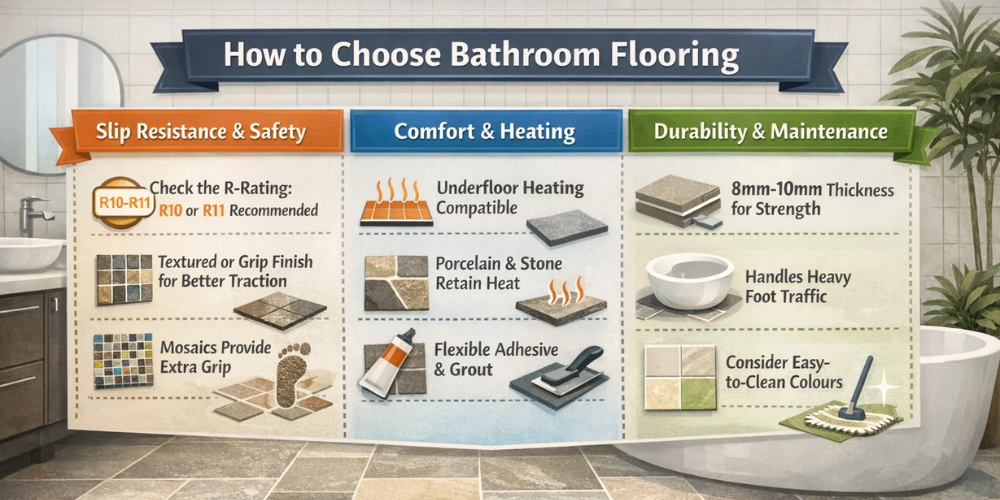
Slip resistance and safety standards
When shopping for floor tiles, always check the "R-rating," which is a measure of its slip-resistant effectiveness. For bathrooms, an R10 or R11 rating is generally recommended. Textured tiles or those with a "grip" finish provide more traction when the floor is wet. Mosaics are also excellent for flooring because the high density of grout lines provides extra grip for your feet.
Comfort and underfloor heating suitability
Bathrooms can be cold, especially in the winter. One of the best tips for how to choose bathroom flooring is to ensure the material is compatible with underfloor heating (UFH). Porcelain and stone are excellent conductors of heat, retaining warmth long after the heating has been turned off. Always check that your chosen adhesive and grout are also flexible and UFH-compatible to prevent cracking.
Durability for different bathroom types
Floor tiles endure more stress than wall tiles, from the weight of the bathtub to foot traffic. Ensure your floor tile is thick enough (usually 8mm to 10mm+) to withstand impact. If you choose a light-coloured floor tile, be prepared for more frequent cleaning, as hair and dust will show up more easily than on a mid-tone or patterned floor.
Practical planning and installation advice
We now consider some practical tips, including planning, installation and DIY vs professional approaches.
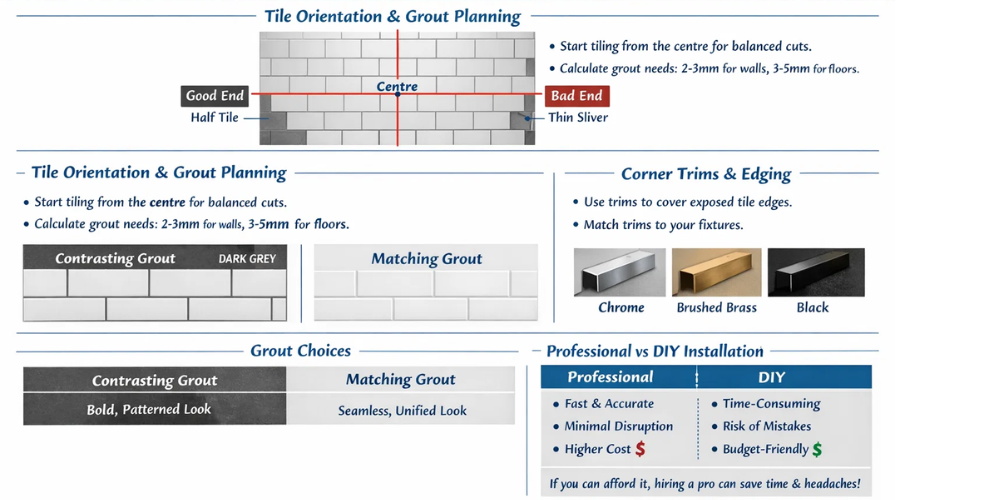
Tile orientation and grout planning
Never start tiling from a corner without checking where the cut will end up on the other side. Always find the centre of the wall and dry lay your tiles outward. If starting at the centre leaves you with a tiny, difficult-to-cut sliver of tile at both ends, shift your starting point slightly to ensure you have a substantial "half-tile" or more at the edges. This is a fundamental step in achieving professional-looking bathroom tile layouts.
While the primary focus is on how to measure for bathroom tiles, do not forget the consumables. Grout coverage depends on the depth of the tile and the width of the joint (usually 2-3mm for walls and 3-5mm for floors). Most manufacturers provide a calculator on the bag to help you determine how many kilos you need based on your total square metres.
Grout is no longer just a necessary filler between tiles. It is now a design feature to be considered. Using a contrasting grout, such as a dark grey to go with white metro tiles, it draws the eye to the layout and showcases patterned tiles. Conversely, matching the grout to the tiles, like using white grout with white tiles, creates a look that is seamless and almost monolithic and can have the effect of making a room feel calmer and larger.
Corner trims and edging
Unless you are using plain tiles with a finished edge (like some natural stones), you will have exposed "biscuits" at external corners. To hide this, you need tile trims. These are available in plastic or metal (chrome, brushed brass, or black). Choosing a trim that matches your taps and showerhead is a pro-level tip for a cohesive bathroom design.
Professional installation versus DIY
Once you have mastered how to choose bathroom tiles and have your measurements ready, the final details make all the difference. For this reason, you need to carefully consider a professional installation versus a DIY approach.
Accuracy is imperative, and it is more likely to make mistakes when approaching the job DIY. These mistakes can be unsightly, or even if corrected, waste your time and possibly mean you will not have enough tiles. Professional tilers will be much quicker, so disruption will be kept to a minimum. Cost-wise, of course, the professional approach costs more. If you can afford to pay for a professional, it often makes sense as it can save you a lot of time and heartache!
Conclusion
When you are wrapping up your plan for choosing the perfect bathroom tiles, bear in mind that top-notch bathrooms are all about finding a sweet spot between being on-trend and being practical for the long haul. Replacing tiles can be a real hassle, so it often pays to choose a timeless option. Personality can then be introduced through accessories, rather than following a short-lived trend that may look out of place within five years. By following the correct steps for measuring up for bathroom tiles, you can avoid costly mistakes and unnecessary waste. Careful consideration of how to choose the right bathroom flooring will help create a space that functions well and looks impressive.
Contact us
Well, we have now concluded our “How to choose bathroom tiles”, and we hope this has answered many of your questions. If you have further clarifications, please do not hesitate to contact us at Plumbing World to discuss which tiles are best for bathrooms in the following ways:
• Phone - 0121 508 9987
• Email - onlinestore@plumbingworld.co.uk
• Also, visit our Contact Us Page
• Live Chat – simply click the blue button, which can be found at the bottom left of any page