How to Fit a Low-Profile Shower Tray: A Complete Shower Trays Fitting Guide for a Flush Finish
When planning a modern bathroom, you need to achieve a clean finish with a tray that sits flush with the floor. A low-profile tray is practical, stylish, and perfect for smaller spaces or a wet room. Knowing how to fit a low-profile shower tray is important in achieving a solid and leak-free installation. An adjustable height shower tray gives you flexibility if the floor beneath needs adjusting or extra support. By preparing the walls, pipework, and drainage, you can create a solid base that is both functional and beautiful. In the following sections, we will explain how to approach fitting a low-profile shower tray, ensuring each stage transitions smoothly to the next for a professional result.
What is a low-profile shower tray?
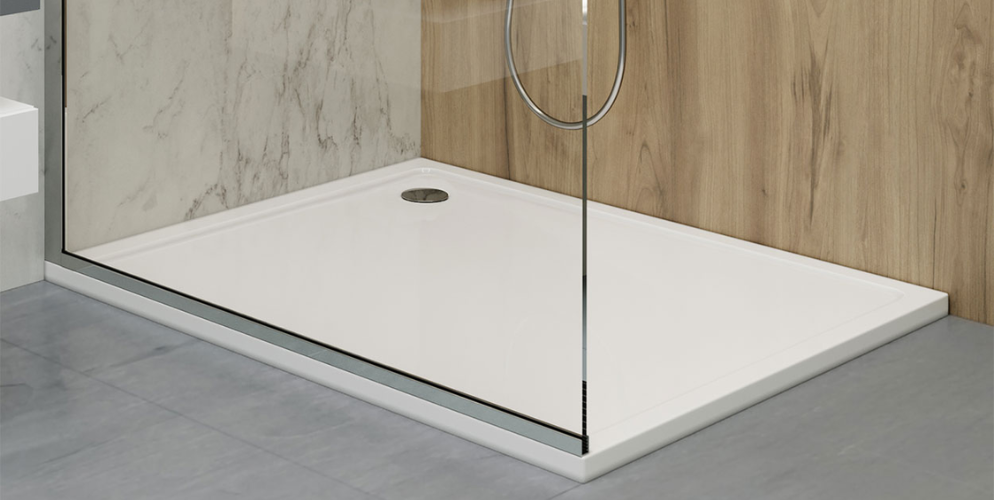
A low-profile shower tray is a slim, modern tray designed to sit close to the floor, creating a sleek look in any bathroom installation. The reduced height of the low-profile shower tray makes it particularly useful in a wet room or compact space, allowing easy access and a minimal step. A shower tray of this type still requires a proper waste trap and shower tray waste connection, ensuring the waste pipe and outlet pipe carry water away efficiently. By choosing a low-profile shower tray, you can fit the tray, so it sits completely level, and when fitted correctly, it provides a durable base that helps prevent leaks and water damage.
The Aqua i anti-slip low profile shower tray 760mmx760mm is a great example of a low-profile shower tray.
How to fit a shower tray – tools, equipment and supplies needed
Before you start, you will need to have all the tools, equipment, and materials to hand for shower trays fitting. Having everything ready will save time, reduce mess, and ensure the low-profile shower tray can be fitted without delay.
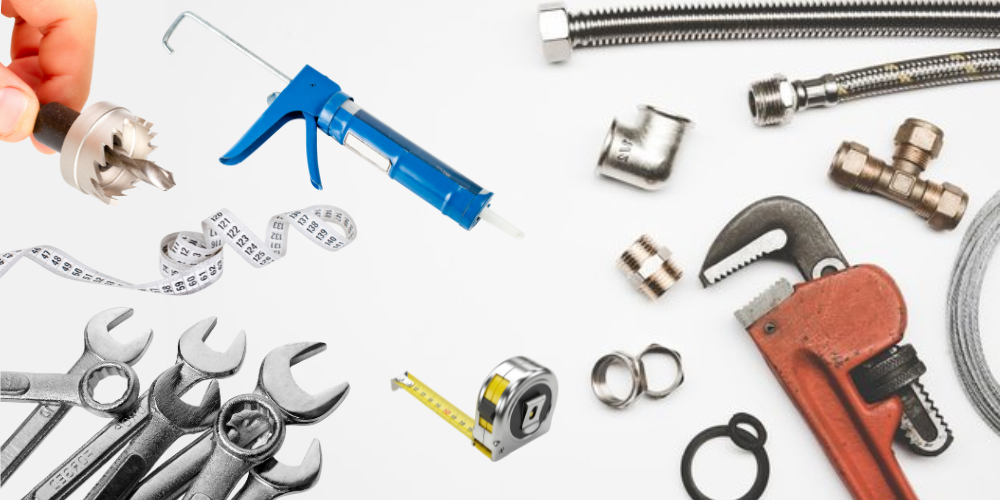
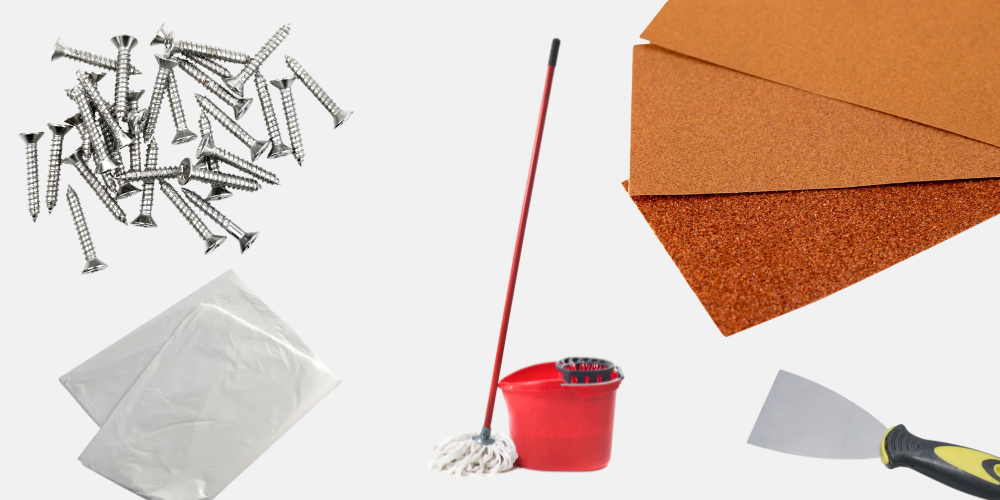
1) Tools
- Adjustable spanner
- Drill
- Measuring tape
- Pencil
- Pipe cutter
- Screwdriver
- Sealant gun
- Spirit level
- Trowel
- Utility knife
2) Equipment
- Bucket
- Cordless driver
- Dust sheets
- Mixing paddle
- Mop and bucket
- Protective gloves
- Safety goggles
- Sponge
- Step stool
- Work light

3) Materials
- Access hatch
- Adhesive
- Grout
- Low-profile shower tray
- Outlet pipe
- Riser kit
- Shower tray waste
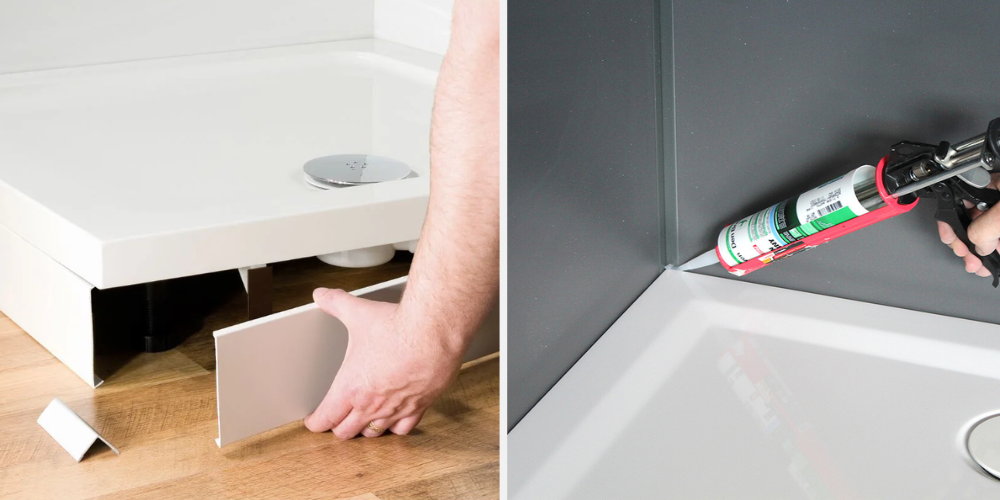
- Side panels
- Silicone sealant
- Tile adhesive
- Tile spacers
- Tiles
- Wall panels
- Waste pipe
- Waste trap
4) Other supplies
- Baking soda
- Caulk finishing tool
- Cleaning wipes
- Clean-up buckets
- Cloths
- Disposable gloves
- Masking tape
- Paper towels
- Rubbish bags
- Scraper
- Sealant remover tool
- Sponge scourers
- White wine vinegar
Step-by-step guide - How to fit a low-profile shower tray
This step-by-step guide will guide you through fitting a low-profile shower tray with precision and durability. Fitting a shower tray correctly will prevent leaks, reduce the risk of water damage, and extend the life of your bathroom.
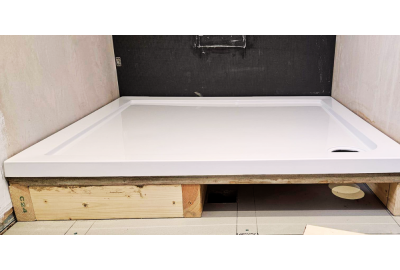
STEP 1) Preparation before shower trays fitting
Proper preparation will ensure your new shower tray is fitted correctly and stays secure in daily use.
Measuring the shower space
Measure the area to check that the low-profile tray will fit within your chosen shower enclosure. Always allow for side panels, walls, and sliding doors to check that there is enough clearance around the shower tray.
Checking the floor structure
Check the floor underneath and make sure it is solid, strong, and can support a low-profile shower tray. If on a concrete floor check, there is no hidden pipework or obstacles that will affect the installation.
Preparing plumbing connections
Check the alignment of the waste pipe and measure where the shower tray waste hole will be. Check that the outlet pipe and trap are clear and fit an access hatch if you need to get in there in the future.
Ensuring a level subfloor
Use a spirit level to check that the floor is completely level before you put the tray down. Adjust the surfaces with compound or packers if needed to get to the required level.
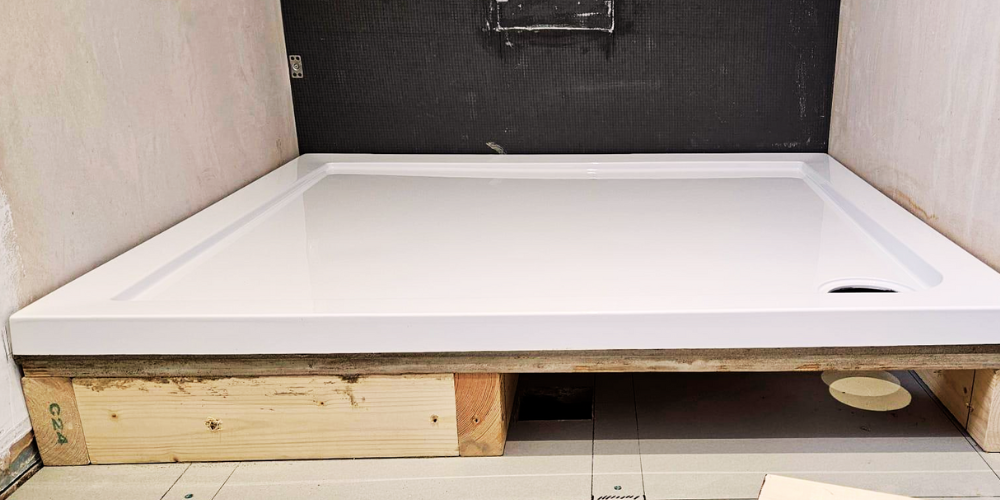
STEP 2) Positioning the low-profile shower tray
Positioning the shower tray correctly is vital before applying adhesive or sealing products.
Dry fitting the tray
Put the tray in the bathroom for now to check the fit in the space and against the walls. Check the legs or adjustable legs are level and note any difference in leg height. Dry fitting allows you to mark the height you want and makes the installation process smoother.
Marking the waste outlet location
Use the waste trap as a guide to mark the position of the shower tray waste. Check the alignment of the trap to the waste outlet before you go any further.
Checking alignment with enclosure
Check that the tray aligns with any wall panels or side panels that will be fitted later. Make sure there is enough space for an enclosure and for future adjustments if needed. Do this now, and you will not have to replace or reposition later.
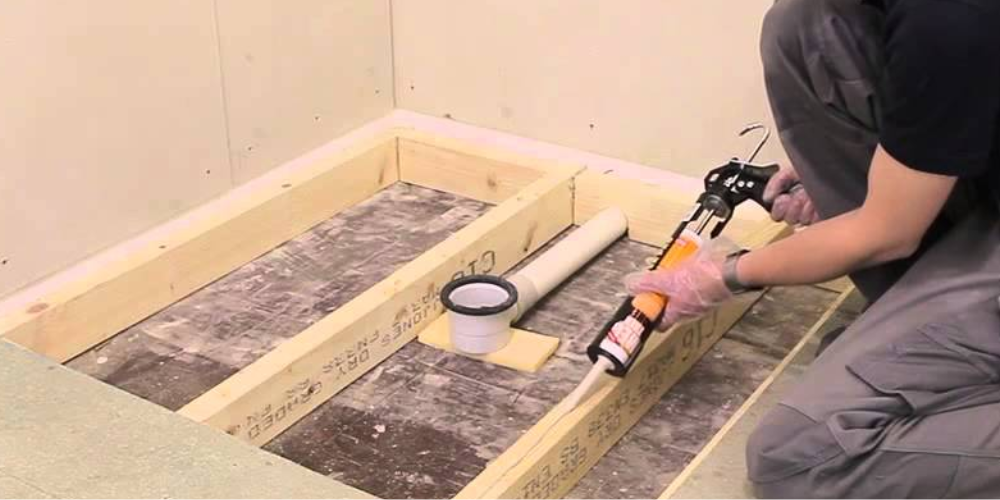
STEP 3) Installing the waste system
Fitting the waste correctly prevents leaks and ensures good drainage in your shower area.
Attach the waste trap to the outlet pipe; all joints must be secure. The trap must sit underneath the shower tray with access if needed. Check that the pipework allows waste to flow straight to the main drain.
Sealing joints to prevent leaks
Seal all joints with sealant to create a secondary seal and prevent water escape. A watertight seal here will prevent water damage under the tray. Always test connections by pouring water through the system before moving on.
STEP 4) Securing the shower tray
Securing the low-profile tray will keep it stable and in the right place for installation.
Applying adhesive or a mortar bed
Lay a thin layer of mortar or adhesive across the floor surface. This will give the tray a stable base and hold it in place.
Positioning the tray in place
Carefully lower the tray onto the bed, aligning with your marked position. Check that the legs are balanced and do not move during placement. A new tray may need a little adjustment to sit flush against walls and panels.Ensuring levelness with a spirit level
Place a spirit level across the edges of the tray to check that it is level. If needed, adjust the legs or support material to get a completely level base. This will stop water pooling and protect the installation.
STEP 5) Sealing the shower tray
Effective sealing stops water from escaping around the edges of the shower tray.
Applying silicone sealant
Apply a neat bead of silicone sealant where the tray meets the walls and side panels. This will create a barrier and stop leaks from seeping through the edges.
Curing time before use
Always allow the sealant to cure for at least 24 hours before using the shower. Using before then could compromise the seal and cause water damage.
STEP 6) Installing wall panels or tiles
Finishing with tiles or wall panels completes the bathroom and protects the walls.
Waterproof boarding
Fit waterproof boards to give a solid surface for tiles or panels. This reduces the risk of water damage and increases durability in a wet room.
Fixing tiles or panels
Lay each tile or panel carefully with adhesive or attach the chosen panel securely. Make sure even spacing and a flush finish on all walls.
Grouting and sealing edges
Grout between each tile and let them dry. Seal all edges with sealant to prevent future leaks.
STEP 7) Final checks and testing
The final part of our “How to fit a shower tray guide” is to complete some final checks to make sure the installation is safe and working.
Water flow and drainage test
Run the shower and check the waste system; no water should be pooling on the tray. This will confirm that the waste pipe and trap are working.
Seal checks for leaks
Check every edge where sealant was applied to make sure there are no leaks. If needed, replace any weak seal.
Maintenance tips for long-term use
Ongoing maintenance delivers “prevention is better than cure”. It will extend your shower tray’s lifespan and might avoid later costly repairs.

a) Regular cleaning advice
Clean the tray weekly using mild solutions such as bicarbonate of soda and white wine vinegar. Abrasive chemicals MUST be avoided as they degrade the sealant and affect the edges. For persistent marks, gently scrub but avoid damaging tiles, panels, or the tray surface. Routine care will keep water flowing freely and maintain a hygienic bathroom.
b) Resealing when required
Inspect seals frequently, replacing any deteriorated silicone sealant you can see. Look for early signs of mould, cracked lines, or tiny leaks around the tray. Resealing prevents bigger issues from developing within the wet room.
c) Preventing blockages in the waste
To prevent blockages in your shower waste system, remove hair, soap, and scum residue in the waste trap area on a regular basis. Also, check the access hatch from time to time to ensure that maintenance can be performed easily when needed. These simple steps will keep water flowing efficiently and help you avoid rising water overflow or damage beneath the tray.
Buying low-profile shower trays from Plumbing World
- Brands – choose from brands such as Aqua i, Hudson Reed, MX Elements, Merlyn, Serene and others
- Colours – select from black, brass, chrome, grey, stainless steel, and white
- Shapes – we have a large selection available including curved, D-shaped, offset, offset quadrant, pentagonal, rectangular, and square
- Size ranges – we have sizes stretching from 1000mmx800mm, up to 2000mmx900mm
- Styles – these include chrome effect, flat-top and walk-in
Conclusion
Installing a low-profile shower tray provides a sturdy base that keeps your bathroom looking sleek. Ensuring the tray is fitted correctly with silicone sealant and a watertight seal will help prevent long-term leaks. Following a clear process on how to fit a low-profile shower tray allows you to secure the base, ensure the waste outlet is correctly installed, and test drainage. Using an adjustable height shower tray makes the task easier, especially where there is an uneven concrete floor or awkward leg height adjustments.
After the shower enclosure and side panels are installed, you can be confident that the tray is completely level. Ongoing maintenance, such as resealing and checking the secondary seal, ensures durability and avoids costly repairs. With the right preparation, shower tray fitting can be completed smoothly, leaving a professional finish that enhances both comfort and value.
Contact us
Bring your project to life with support from Plumbing World, where our team can guide you through design choices and product selection. From advice on shower trays fitting to practical help on how to fit a shower tray, we are here to make the process straightforward and stress-free. Our experts can also provide clear guidance on fitting a low-profile shower tray, ensuring every tray is installed securely and ready for long-term use.
- Phone – 0121 508 9987
- Email – onlinestore@plumbingworld.co.uk
- Contact details – see our Contact Us Page
- Live Chat – click the blue button in the bottom left corner of any page